
October 8, 2026
Media Wall Installation: The Modern Way to Hide Every Cable and Device
Learn how a built in media wall with fireplace, hidden wiring, and integrated storage turns your living room into a clean, modern focal point.

Are you searching for media wall installation near me to create a cleaner, more functional living room? A professionally designed media wall can combine your television, fireplace, soundbar, storage, lighting, and connected devices into one organized feature. Instead of mounting a screen on an empty wall with visible cables and separate equipment, you get a clean, seamless finish designed around the way you use your room.
What Is a Media Wall?
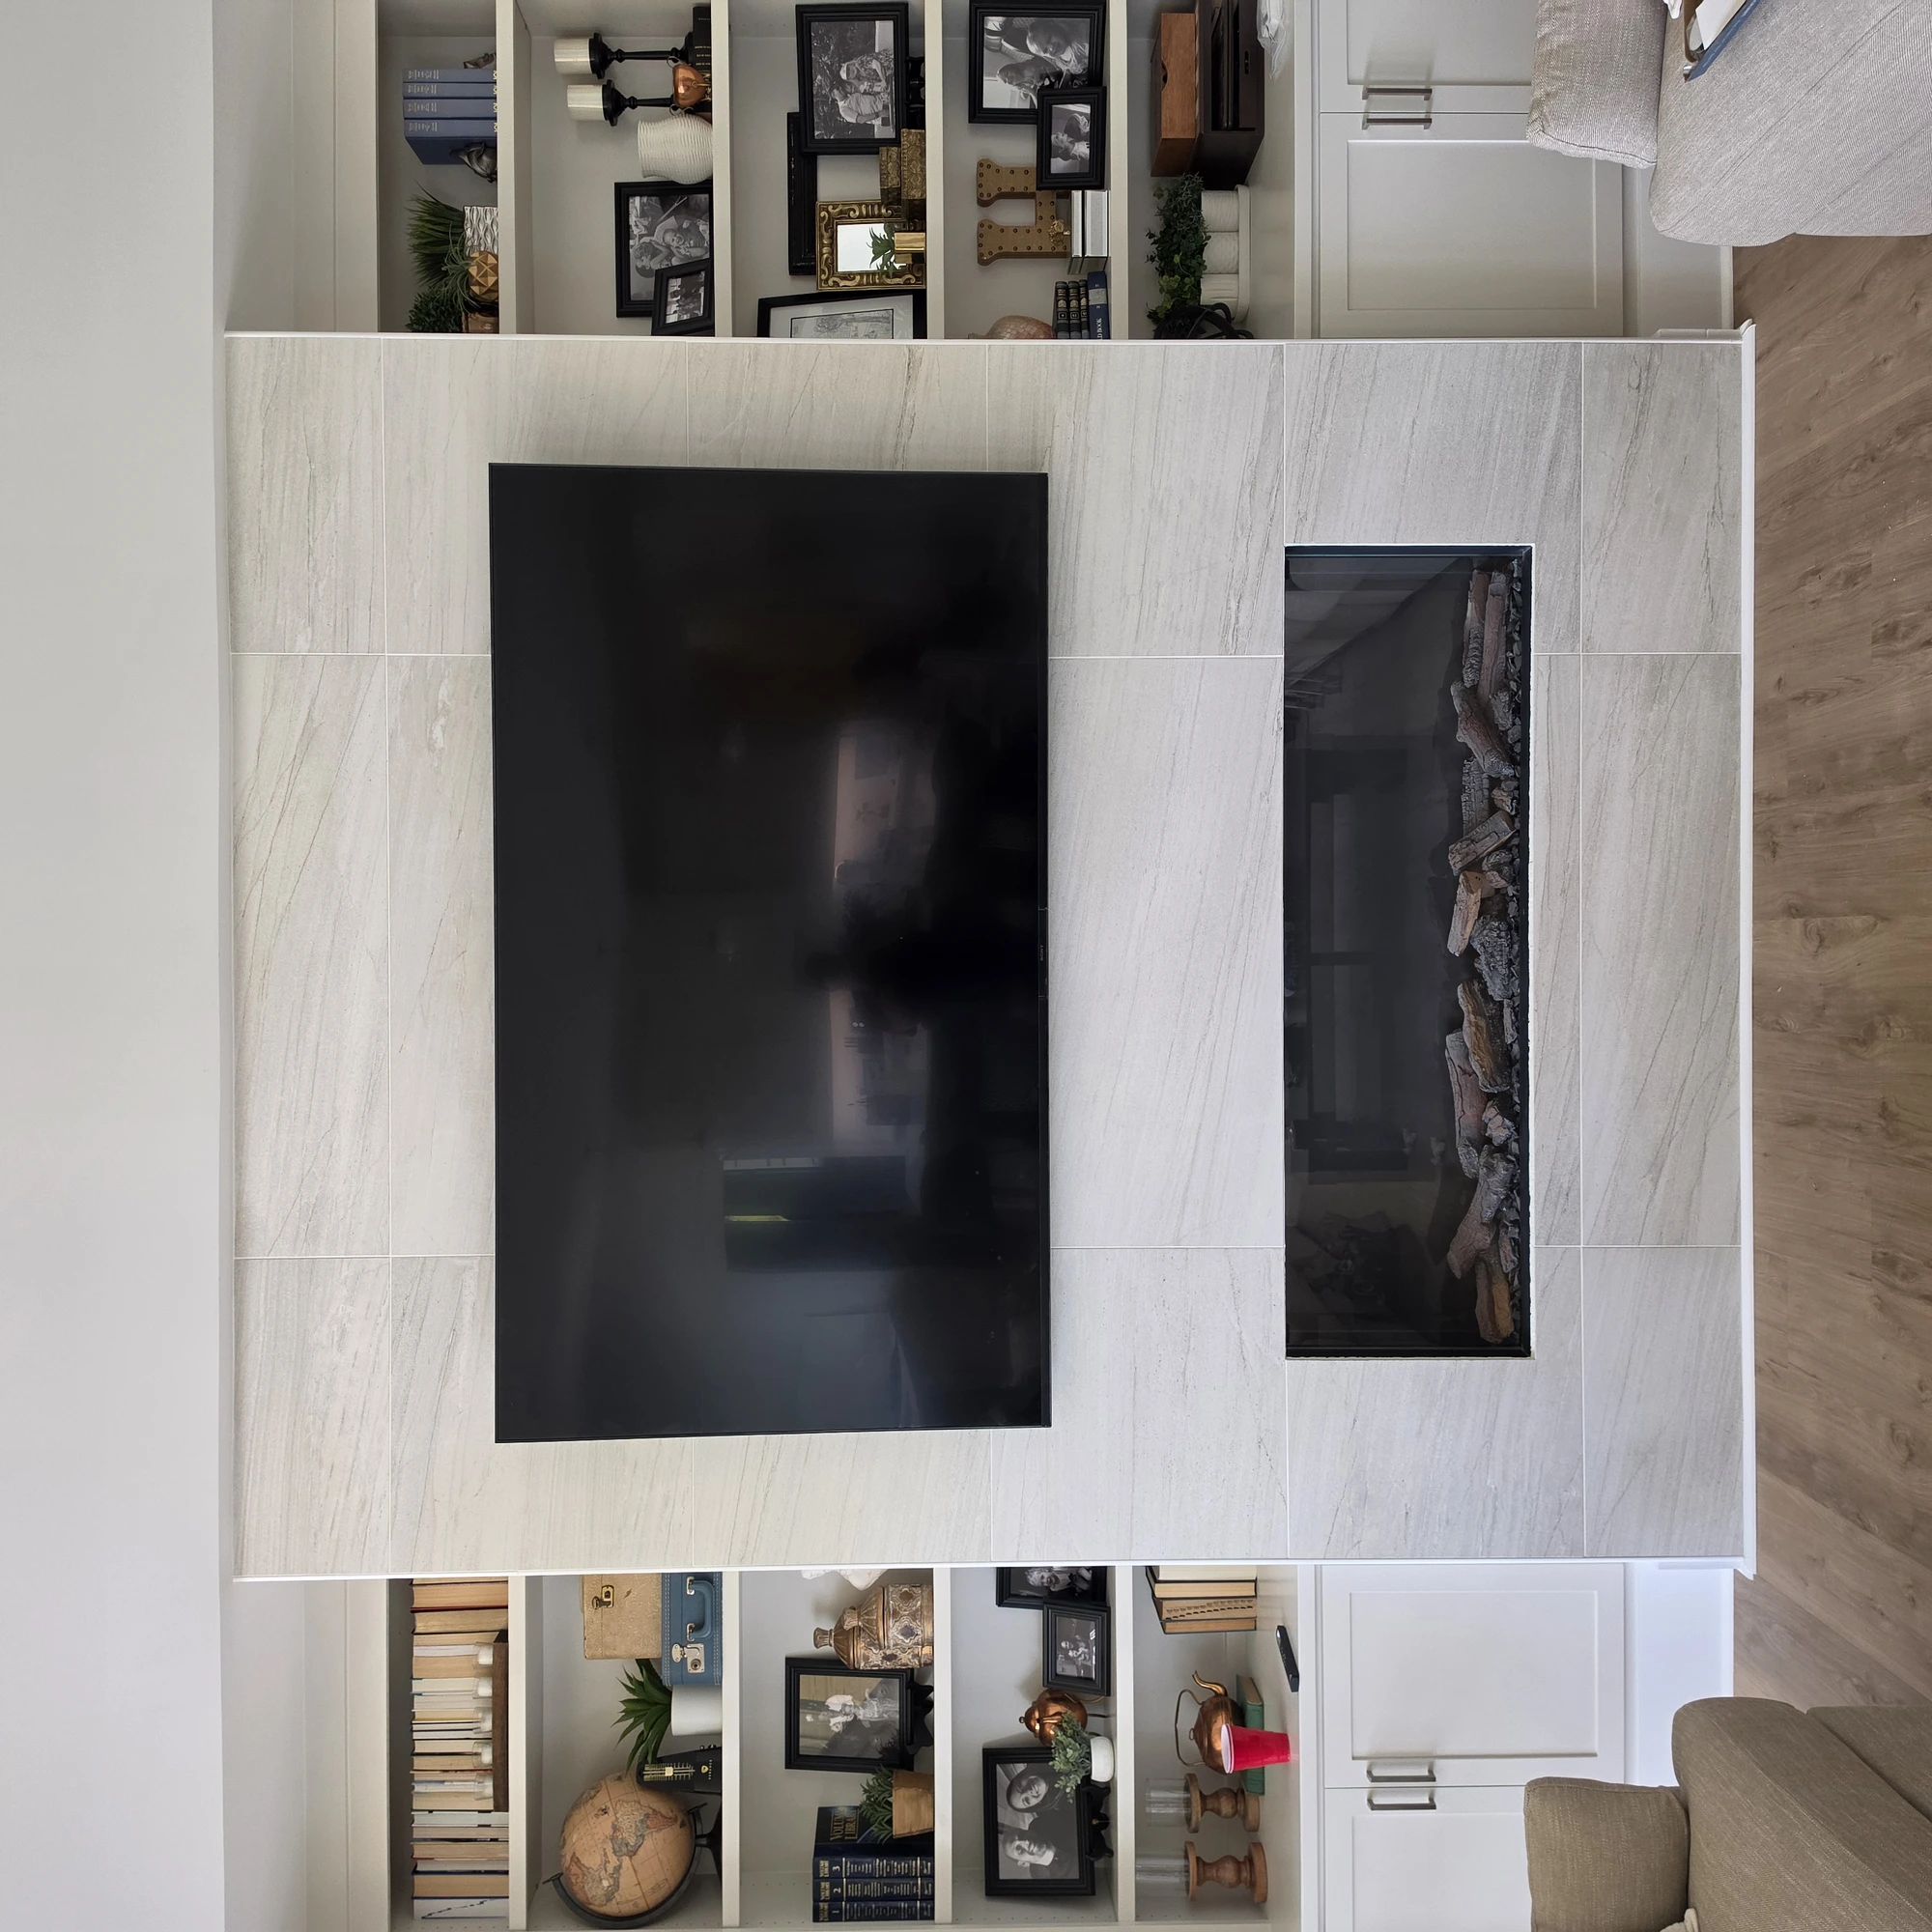
A media wall is a built-in entertainment feature that integrates your television and related equipment into the architecture of the room. Depending on your goals, it may include a recessed TV niche, electric fireplace, floating cabinets, open shelving, accent materials, LED lighting, and concealed wiring.
The result is more than a decorative wall. A properly planned tv media wall improves equipment access, cable management, viewing comfort, and the overall appearance of your home. It can also create a stronger focal point than a plain TV wall because every component is proportioned and positioned as part of one design.

Media Wall Installation vs. a Simple TV Mount
A basic TV mount secures the display to the wall. That can be an excellent solution when you want a fast, minimal installation. A full media wall installation addresses the entire entertainment system, including the wall structure, power, signal paths, audio, storage, ventilation, lighting, and finish materials.
- Simple TV mount: Installs the television on a fixed, tilting, or articulating bracket.
- TV media wall: Integrates the screen with cabinetry, niches, speakers, lighting, and decorative finishes.
- Built in media wall: Creates a custom architectural feature with concealed equipment and coordinated storage.
- Media wall with fireplace: Combines a display and firebox while accounting for heat clearance and electronics protection.
DIY projects often overlook stud locations, cable ratings, outlet placement, ventilation, and bracket loading. Professional installation provides peace of mind because the structure and AV system are planned together before the wall is closed.
Design the Layout Around Your Screen and Seating
The best media wall starts with the room, not a catalog photo. Screen size, seating distance, eye level, window locations, viewing angles, and sound distribution all affect the final layout. Before framing begins, use painter’s tape or a temporary template to test the proposed screen size and position.
- Screen size: Select a display that fits the room and provides comfortable detail from your primary seating position.
- Seating distance: Confirm that viewers can see the entire screen without excessive head movement or eye strain.
- Viewing height: Position the screen so the main viewing angle is comfortable. A fireplace below the TV may require a taller installation, so the design should minimize upward viewing.
- Wall proportions: Center the television, fireplace, shelves, and cabinetry as a coordinated composition.
- Service access: Leave practical access to power outlets, network equipment, streaming devices, and other components.
A professional media wall installation in Rocky Mount NC should also account for the wall construction. Masonry, framed walls, plaster, and existing built-ins require different fastening methods and preparation.
Planning a Media Wall With Fireplace
A media wall with fireplace is one of the most popular built-in designs, but the fireplace must be selected and installed with the television in mind. Electric fireplaces are often practical for this application because many models do not require a chimney or exterior vent. Gas units may require additional depth, venting, combustion clearances, and specialized installation.
Heat management is essential. Always follow the fireplace manufacturer’s installation manual for clearances above, below, and beside the firebox. The design may need a noncombustible backer, heat-resistant board, mantel, deflector, or additional separation between the fireplace and television.
- Confirm the required cavity dimensions before framing.
- Maintain the manufacturer’s minimum clearance from the TV, soundbar, wiring, and combustible materials.
- Use the correct fire-rated or heat-resistant materials around the fireplace zone.
- Verify that warm air is not discharged directly toward the television or electronics.
- Test the fireplace at normal operating settings after installation.
Clearance requirements vary by model, so generic spacing recommendations should never replace the product manual. Setup Home Theater can coordinate the AV layout with your fireplace plan and identify when a licensed trade partner is needed for electrical, gas, or construction work.
Recessed Niches, Hidden Wiring, and Safe Power
A recessed TV niche allows the screen to sit nearly flush with the face of the media wall. This reduces visual depth and creates a more integrated appearance. The niche must be framed for the exact display and bracket, with solid structural backing in the correct mounting locations.
Hidden wiring begins before the wall is finished. HDMI, Ethernet, speaker wire, control cables, and other low-voltage connections should be routed through an organized pathway. Use properly rated in-wall cables and keep low-voltage wiring separated from line-voltage wiring as required by applicable electrical standards.
Power should be planned with a listed power solution, not an extension cord buried behind the wall. Place outlets where they remain accessible and coordinate power for the TV, fireplace, soundbar, lighting, network equipment, and serviceable components. Label and test every cable before the wall is closed.
Built-In Storage, Shelving, and Equipment Ventilation
A built in media wall can hide more than cables. Cabinets and shelving can organize receivers, game consoles, streaming devices, remotes, media players, and networking equipment. However, equipment should not be sealed into an unventilated cavity.
- Ventilation: Provide airflow around receivers, amplifiers, game consoles, and other heat-producing equipment.
- Service access: Use removable panels, accessible shelves, or rear cable openings for future maintenance.
- Signal planning: Include network connectivity and sufficient HDMI capacity for current and future devices.
- Storage design: Combine closed cabinetry for visual clutter with open shelving for equipment that needs ventilation or remote control access.
- Load support: Reinforce shelves and cabinets for the weight of AV components and accessories.
Finish materials can change the entire character of the room. Popular options include shiplap, stone veneer, wood slat panels, painted MDF, textured plaster, and smooth architectural panels. The material should complement the room while allowing access to the technology behind it.
Lighting, Soundbar, and In-Wall Speaker Integration
Lighting can add depth without distracting from the screen. LED backlighting behind the TV, shelf lighting, toe-kick lighting, and accent lighting can be connected to a smart control system. Use dimmable fixtures and select color temperatures that support comfortable viewing.
Audio should be considered before the wall is framed. A soundbar can be mounted below the screen or integrated into a dedicated opening. In-wall or in-ceiling speakers may provide a cleaner appearance for a larger system, while a subwoofer may need careful placement to avoid unwanted vibration.
Setup Home Theater works with more than 80 industry-leading brands, including Samsung, LG, Sony, Sonos, Lutron, and Sanus. This experience helps us coordinate displays, mounts, speakers, lighting controls, and smart home equipment into one reliable system.
Projector and Screen Alternatives
A large television is not the only option. If you want a larger image or a dedicated cinema experience, a projector and screen may be a better fit. A motorized screen can conceal above the media wall, while an ultra-short-throw projector can sit close to the wall and reduce ceiling wiring.
Projector systems require careful planning for screen width, throw distance, ambient light, power, ventilation, and speaker placement. For rooms designed around movies and sports, a professional home cinema installation can provide the correct layout and final calibration.

When You Need an AV Installer, Contractor, or Carpenter
An AV installer handles the technology layer, including display mounting, signal distribution, speakers, control systems, network connectivity, cable management, and calibration. A general contractor or carpenter may handle framing, drywall, cabinetry, trim, stone, shiplap, and other finish work.
Some media walls are straightforward AV installations. Others require multiple trades. You may need a contractor, carpenter, electrician, fireplace specialist, or painter when the project involves structural changes, new circuits, gas connections, custom cabinetry, or extensive wall construction.
The key is coordination. The AV plan should be completed before construction so that backing, conduit, outlets, speaker openings, ventilation, and access panels are not added as afterthoughts.
What to Expect From Media Wall Installation
Most projects follow a structured process designed to minimize disruption and prevent rework:
- Consultation: Review the room, seating, equipment, design preferences, wall construction, and budget.
- System design: Select the display, fireplace, mount, speakers, lighting, cabinetry, wiring, and control strategy.
- Pre-installation planning: Confirm dimensions, structural backing, power locations, cable routes, ventilation, and trade coordination.
- Construction and finish: Complete framing, niches, cabinetry, wall treatment, paint, stone, or wood accents.
- AV installation: Mount the display, install audio equipment, connect sources, route cables, and configure controls.
- Testing and calibration: Verify signal quality, audio performance, viewing angle, lighting scenes, remote operation, and fireplace clearances.
A smaller TV media wall may be completed in a few days once the materials and trades are ready. Larger built-in projects can take longer because cabinetry, finish materials, electrical work, and fireplace installation may require separate scheduling.
Start Your Media Wall Installation Near Rocky Mount
A media wall should look built into your home because it was planned as part of your home. With the right structural support, heat protection, wiring, ventilation, audio integration, and finish materials, you can replace a cluttered TV wall with a clean, modern focal point.
Setup Home Theater provides professional TV installation and wall mounting for homeowners in Rocky Mount, Raleigh, Wilson, Greenville, Tarboro, Roanoke Rapids, Nashville, Smithfield, Goldsboro, Zebulon, Wendell, Louisburg, Oxford, and Henderson.
Call 252-270-1280, email chris@setuphometheater.com, or use our contact page to discuss your project. We will help you create a safe, precise, and seamless media wall installation designed around your home and entertainment system.
Ready to upgrade your setup?
Our local team designs, installs and calibrates it all. Get a free quote today.
Call 252-270-1280